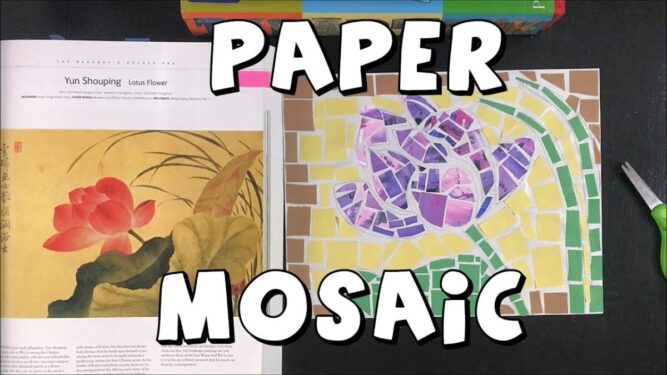
A mosaic is a piece of art made by assembling small pieces of materials such as coloured glass, stone, paper or plastics. It is often used in decorative art or as interior decoration and is a great way to teach kids to use smaller objects to create larger pictures.
What you’ll need:
Thick card/paper
Coloured paper
Led pencil
Scissors
Glue stick
How to do it:
Step 1. Draw a design on the piece of paper. Clear and simple designs are easiest and often the most effective. Shapes, nature, food or animal images work well. You could even find a picture in a book and use it as inspiration.
Step 2. Cut coloured paper into strips of different lengths and sizes.
Step 3. Cut strips of paper into smaller squares, rectangles, triangles and diamonds so that it will fit within the design on the paper.
Step 4. Glue small squares (and other shapes) into the design. Remember to leave small gaps between the pieces as this adds to the effect of the image.
Step 5. Keep gluing until the entire design is filled.
Therapeutic benefits for kids:
Paper Mosaic art can support kids to develop and better understand their feelings. Being upset or hurt is not always easy to describe in words, but kids can put these emotions into a Paper Mosaic and make it easier for themselves and others to understand. This creates a starting point for conversation, which can lead to a more open expression of feelings and thoughts.
To complete a Paper Mosaic, kids need to use their planning and cognition skills too, to draw the image and then determine what pieces will ‘fit’ best to bring the art to life. Kids will also develop their hand/eye skills when drawing shapes/images for the mosaic, cutting the paper and gluing the pieces onto the art.